“`html
Unveil the Magic of Atta Flatbread: A Journey of Flavor and Tradition
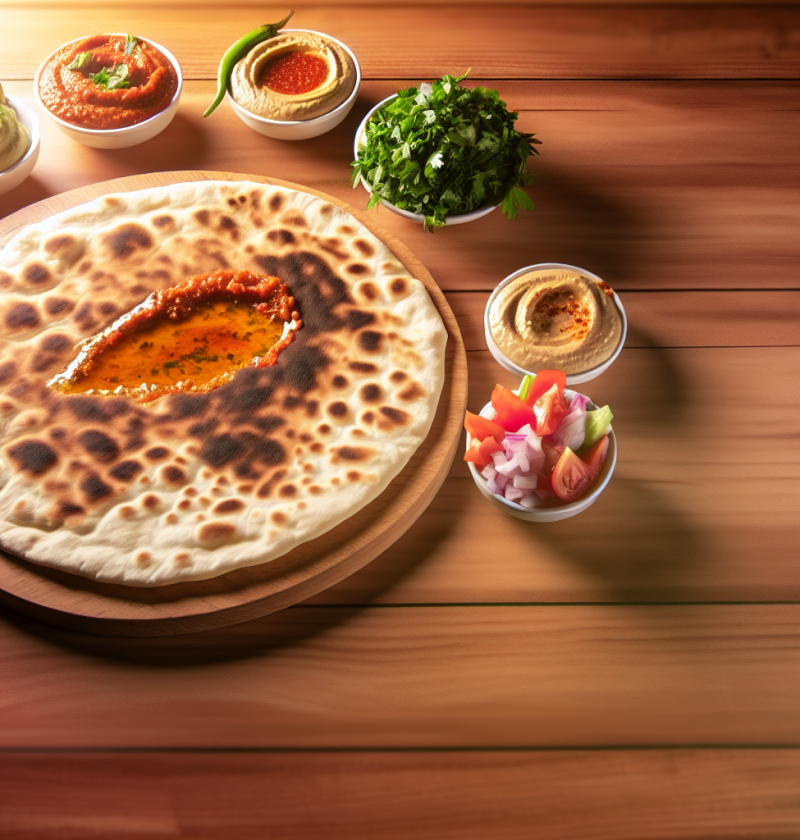
There’s something uniquely satisfying about a warm, freshly made flatbread that simply sings of home. The aroma wafting through your kitchen while it cooks, the soft and chewy texture that pairs perfectly with diverse dishes, truly creates a culinary experience like no other. Atta flatbread, made from whole wheat flour, not only brings tradition to the table but also enriches each meal with its authenticity and warmth. Perfect for dipping, rolling, or simply savoring on its own, this flatbread is bound to become a staple in your home, just as it has in mine. And the best part? This delightful recipe is straightforward and incredibly rewarding! Let’s dive into the world of attas, and soon you’ll be treating yourself and your loved ones to this edible embrace.
Preparation Time
- Total Time: 30 minutes
- Preparation Time: 10 minutes
- Resting Time: 15 minutes
- Cooking Time: 5 minutes per flatbread
This recipe serves 4-6 people, making it ideal for family gatherings or cozy weeknight dinners. It is easy to prepare, even for novice cooks! Now, let’s explore what you’ll need to create this delightful dish.
The Necessary Ingredients
- 2 cups whole wheat flour (atta)
- 1 teaspoon salt
- 1 tablespoon oil (optional for tenderness)
- Water (approximately 3/4 cup, adjust as needed)
- Ghee or butter for brushing (optional)
If you’re looking for alternatives, consider using gluten-free flour blends to meet dietary needs, or swap out the oil for a vegan version with coconut oil or simply leave it out. For added nutrition, you might sneak in some ground flaxseed or chia seeds into your flour. The beauty of this recipe lies in its versatility!
The Steps of Preparation
Follow these simple steps to create your own scrumptious flatbread that’s sure to impress!
- In a mixing bowl, combine the whole wheat flour and salt.
- If using, add the oil and mix until crumbly.
- Gradually add water while mixing, until a soft dough forms.
- Knead the dough for about 5-7 minutes until smooth and elastic.
- Cover the dough with a damp cloth and let it rest for 15-20 minutes.
- Divide the rested dough into 6 equal portions and shape them into balls.
- On a lightly floured surface, roll out each ball into a circle, approximately 1/8 inch thick.
- Preheat a skillet or tava over medium-high heat.
- Place the rolled-out flatbread onto the skillet and cook for 30 seconds until bubbles form.
- Flip the flatbread, cooking the other side for another 30 seconds.
- If desired, press the edges with a spatula to puff it up.
- Remove from skillet, brushing with ghee or butter if preferred.
- Repeat for remaining dough balls, stacking the flatbreads in a covered container to keep warm.
As you master this recipe, you might find your own rhythm, whether you prefer a thicker or thinner flatbread. The choice is yours, and each bite reflects your personal touch and flair!
Nutritional Benefits
- Whole wheat flour is rich in dietary fiber, promoting better digestion.
- It contains essential vitamins and minerals, such as iron, magnesium, and zinc.
- Low in fat, making it a healthy option compared to other types of bread.
- Offers plant-based protein, supporting muscle health and recovery.
- The ingredients are naturally low in sugar, making it suitable for balanced diets.
Now that you’ve created this wholesome flatbread, consider upgrading its appeal! You can stuff it with various fillings like spiced potatoes, roasted vegetables, or even spread a layer of hummus or pesto for a flavorful twist.
Possible Additions or Upgrades
- Herbs and spices like cumin, coriander, or garlic powder added to the dough for flavor.
- Grated cheese for a more indulgent treat.
- Cooking the flatbreads on a grill for a smoky flavor.
- Pairing with dips like tzatziki or spicy salsa for an appetizer spread.
- Transforming leftovers into a delightful quesadilla by adding cheese and cooking on a skillet.
Lastly, let’s address some common questions you might have regarding this delectable recipe.
FAQs
**Can I use all-purpose flour instead of whole wheat?**
Yes, all-purpose flour works well but lacks the nutritional benefits of whole wheat.
**How can I store leftover flatbread?**
Store in an airtight container in the refrigerator for up to 3 days, or freeze for up to a month.
**Can I make this recipe in advance?**
Absolutely! You can prepare the dough a day ahead and store it in the fridge.
**What can I serve with attas?**
They pair beautifully with lentil curries, grilled vegetables, or simply as a side to soups.
**Is there a gluten-free option for this flatbread?**
Yes! You can use gluten-free flour blends, though the texture may vary.
**How do I prevent the dough from sticking while rolling?**
Using flour on your rolling surface and the dough will help prevent sticking.
**What’s the best way to heat up leftover flatbread?**
Reheat on a skillet for a few seconds on each side for optimal softness.
**Can these be made in bulk?**
Absolutely! You can prepare larger batches and freeze them for easier meals later.
**Should the dough be wet or dry?**
Aim for a soft and pliable dough that’s not sticky or overly dry.
**How do I achieve a puffed-up flatbread?**
Pressing down on the edges as it cooks will encourage puffing, creating that delightful texture!
I hope you’ll find as much joy in preparing and sharing this flatbread as I have with my family. It’s been a staple at our gatherings and a comforting addition to our weeknight dinners. So, gather your loved ones, ignite those stoves, and let the magic of homemade attas fill your kitchen with warmth. If you enjoyed this recipe, please share it with your friends and family on social media to spread the love of delicious homemade meals!
“`

